JD-Quant user guide

From connecting your exchange
to using the trading screen

We walk through connecting an API key, how a bot's deal flows, and using the Trading screen — in that order. Steps that move real money, such as transfers and orders, carry their own warnings.

Register an API key
Nothing on this page places orders, moves funds or starts a bot.
01
How it works

Before you begin, understand where your funds live and what the API key does

Your funds stay in your exchange account, not with JD-Quant. JD-Quant uses the API key you register to read balances and request orders.

Your funds stay on the exchange

Balances and positions live under the exchange account you connect. JD-Quant never custodies your coins.

Reads and orders go through the API

Within the permissions you grant, we ask the exchange to read balances, place orders and move funds inside your account.

Every action has a confirmation step

Switching keys, transfers, starting a bot and manual orders all pass through a confirmation dialog or order screen.

UI Currently active account Dashboard · Trading · Wallet
Active API key
ACTIVE KEY One UI default account Dashboards · manual orders · Wallet
Separately
BOT A bot is pinned to the key it was created with Switching the active key does not change where bots execute
Leverage is fixed at 30x. Small price moves have a large effect on margin and your liquidation buffer, so always check each bot's allocated amount and stop distance on its card before starting — a set shows them per bot; a single bot shows its liquidation price in SUMMARY.
02
CONNECT API KEY

Start with one API key, and split off a trading account if you need to

Running a bot and trading manually on the same exchange account means orders, positions and margin affect each other. JD-Quant supports up to two API keys on different exchange accounts so you can keep them apart.

  1. 1
    Register your main API key

    Create an API key on the exchange account you want to use and register it. A single API key unlocks every feature.

  2. 2
    Check the connection and futures balance

    Save the key and secret, finish the connection check, then confirm your futures account and available USDT.

  3. 3
    Separate your manual-trading account

    To separate bot and manual trading, add an API key from a different exchange account. It is optional, but it reduces the chance of the two interfering.

  4. 4
    Pick the key the UI uses

    Activate one of your registered keys as the default for Dashboard, Trading and Wallet.

Example API key setup Start with one · add a second if needed
Main API keyExchange account A · All features · four strategies in one bot set per account
Register
Separate API key (optional)Exchange account B · All features · manual trading kept apart
Can be added
However many you register, exactly one key is active The active key is the UI's default account; switch to another from your profile.
03
Deal sequence

Know the order of events after your bot enters

It waits for a signal, places the first order, uses safety orders to adjust the average if price moves against it, and closes the deal at take-profit.

WAITING Waiting for a signal Watching RSI or Stochastic
ENTRY First entry Position and take-profit created
SO Safety orders Filled in sequence at the configured prices
AVG Average updated The take-profit level moves with it
TP Deal closed Position cleared, back to waiting
TPTake-profit target
AVGCurrent average
NEXT SONext safety order
LIQLiquidation price
01Next safety order

Check the price of the next fill and how many safety orders remain.

02Average and take-profit

See how the average and take-profit levels moved after a safety order filled.

03Liquidation buffer

Check first whether the gap between the current and liquidation price is narrowing.

Placing your own orders or changing positions on the bot's exchange account can shift its margin and liquidation buffer.
04
Using the trading screen

Three things you will use most on the Trading screen

See two ways to set an order price from the chart, plus how to change the account the UI uses.

12-second walkthrough

Chart ordering and account switching

Set a price or a range directly on the chart and order from there.

01
SHIFT + CLICK

Click a price to open an order draft

Hold Shift and click a price on the chart. That price fills the order ticket. Check the size and margin, then choose LONG or SHORT.

SHIFTCLICK
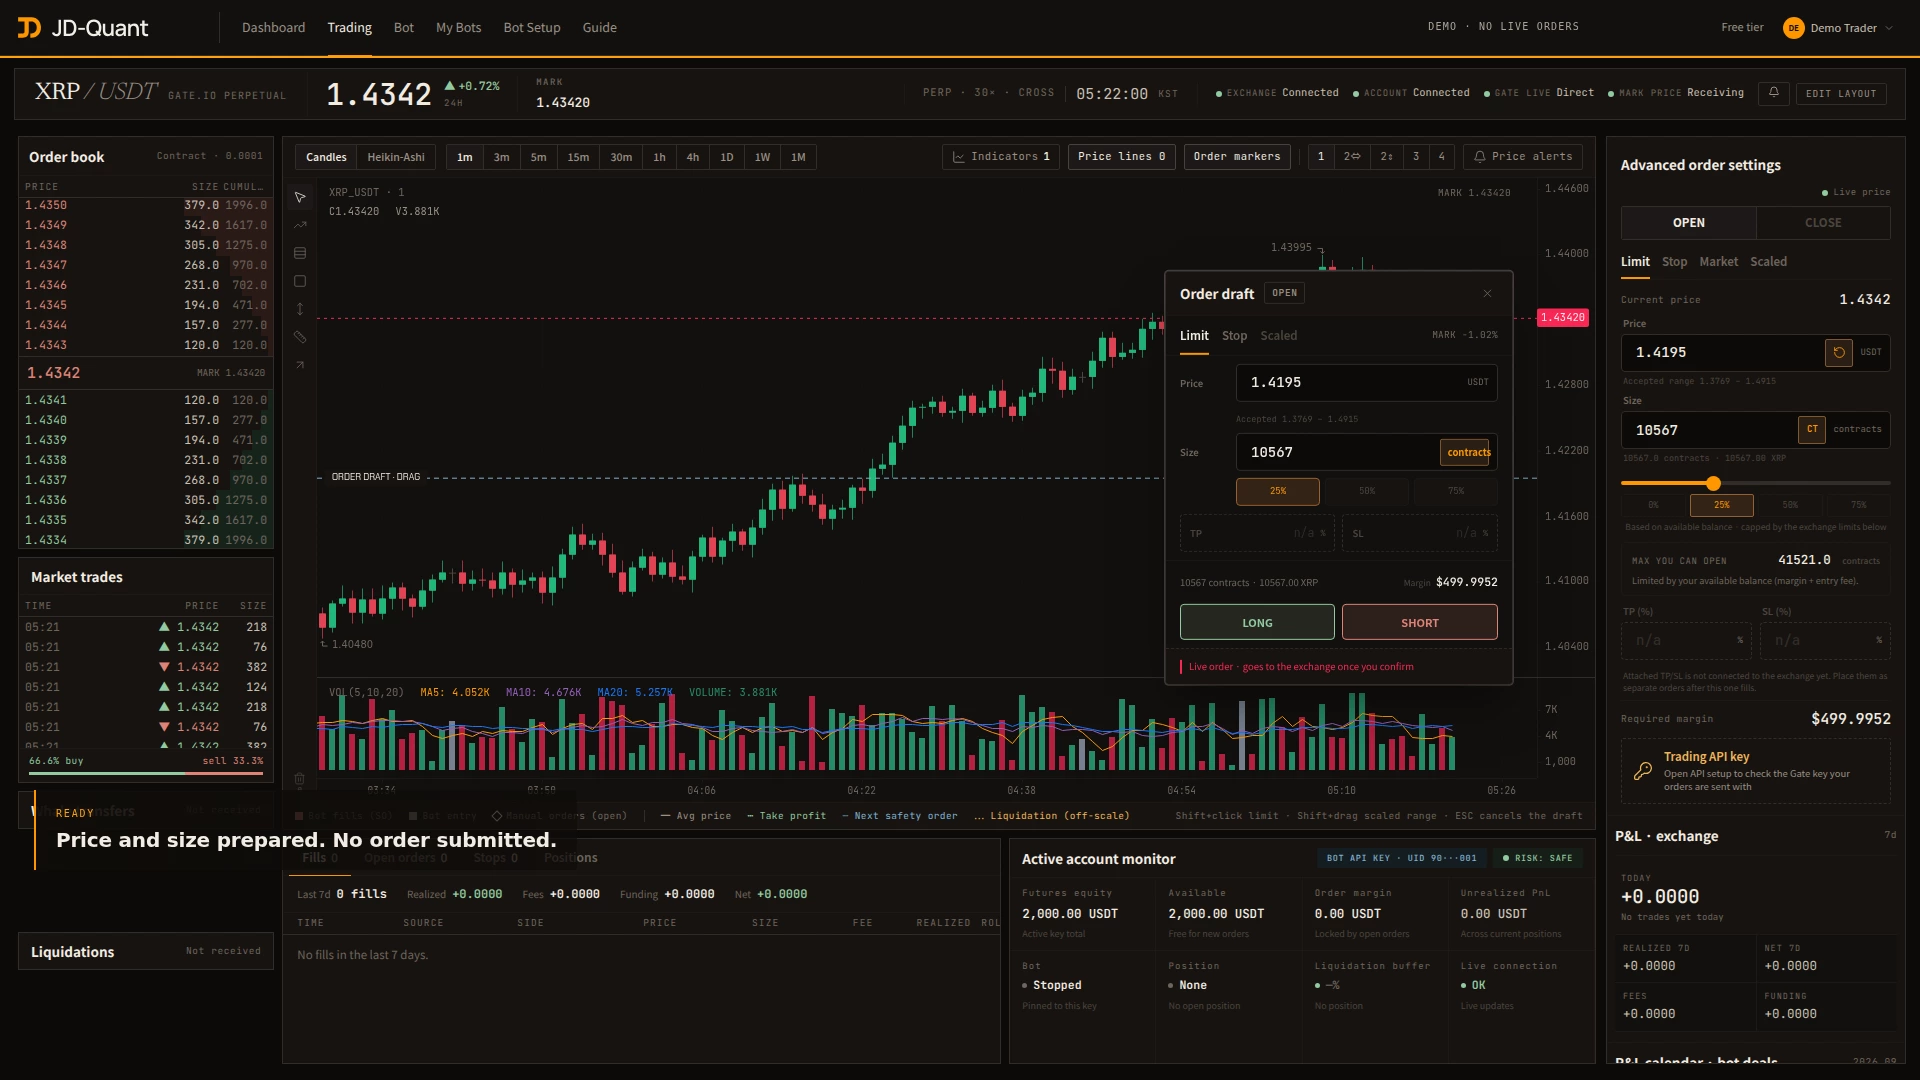
Click a price to open an order draft completion screen
Click a price to open an order draft. Hold Shift and click a price on the chart. That price fills the order ticket. Check the size and margin, then choose LONG or SHORT.
Action SHIFT + CLICK

Pick one price on the chart

What opens Order draft

Review price, size and margin

Submitting After choosing a side

A click alone never sends an order
02
SHIFT + DRAG

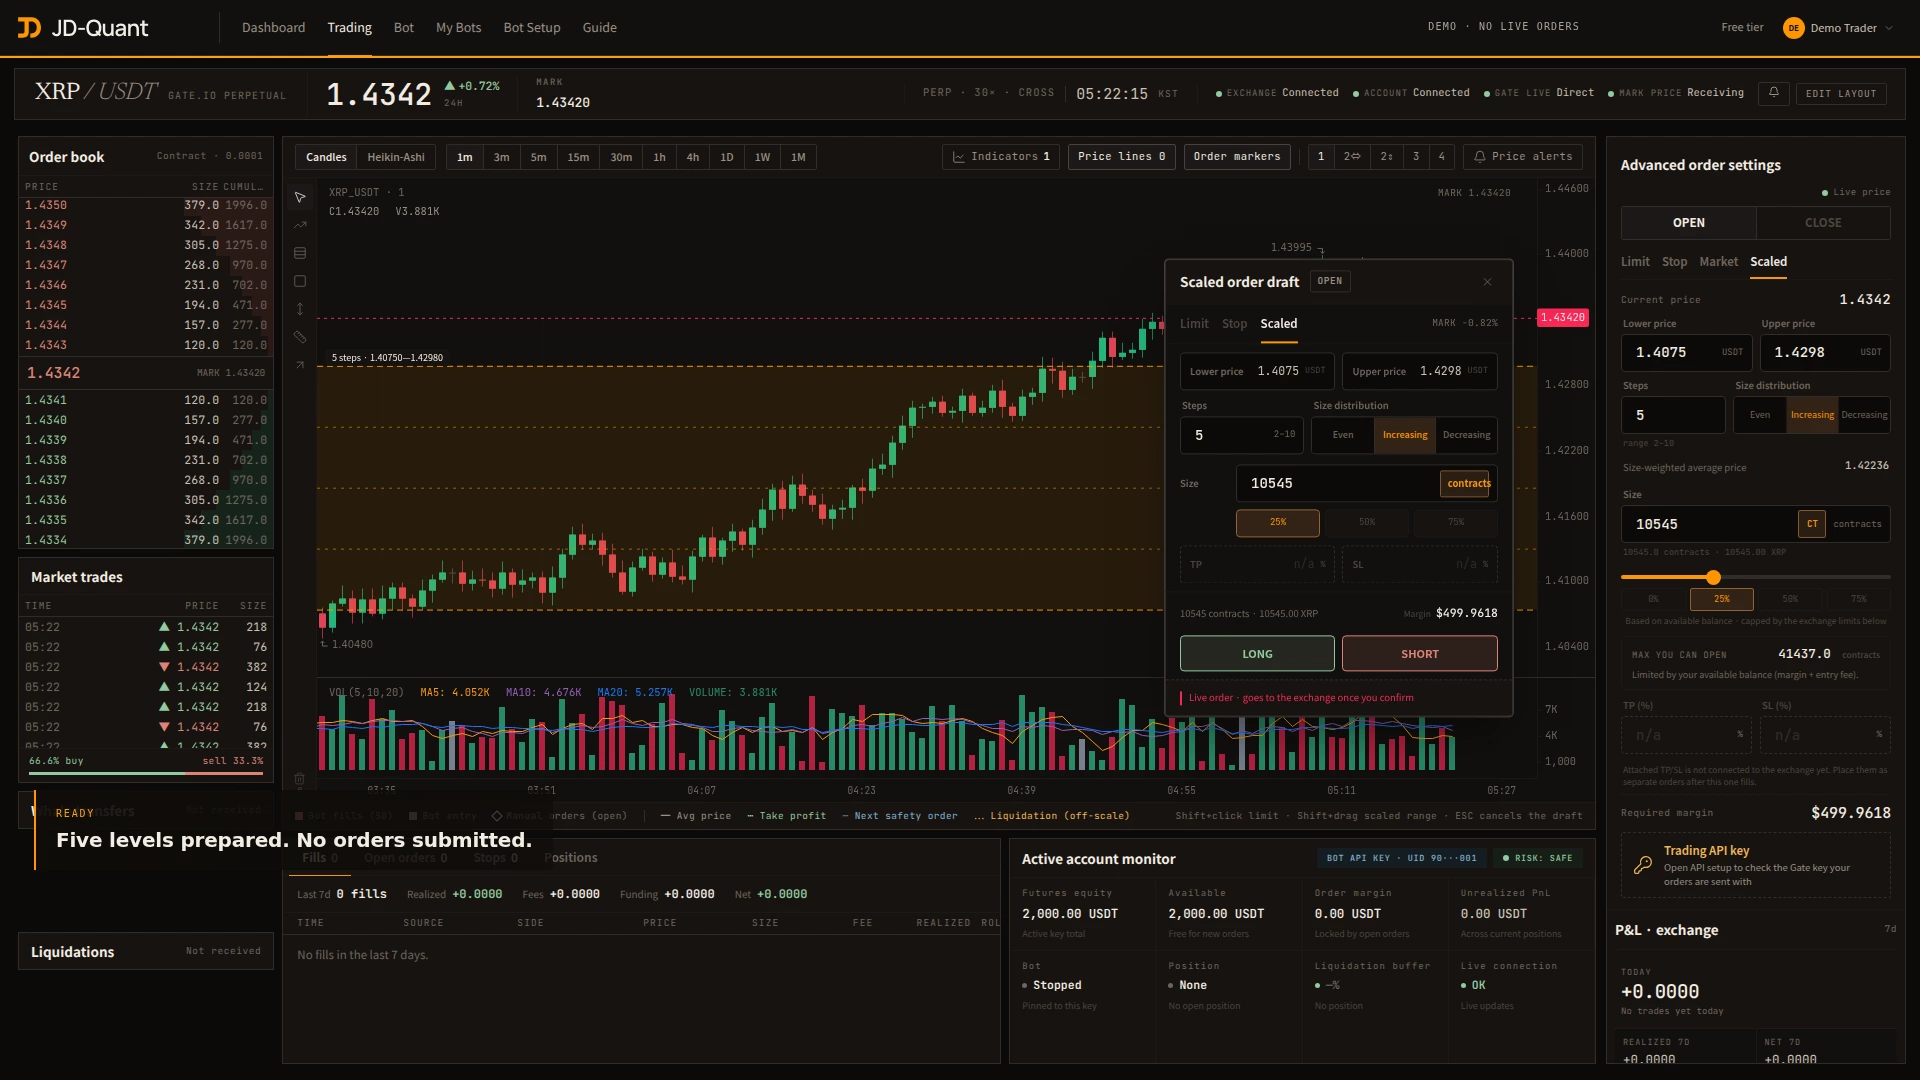
Split a dragged range into several orders

Hold Shift and drag from the start price to the end price. Change the number of orders and the size distribution in the card on the right.

SHIFTDRAG
Split a dragged range into several orders completion screen
Split a dragged range into several orders. Hold Shift and drag from the start price to the end price. Change the number of orders and the size distribution in the card on the right.
Price range Start → end price

Set directly on the chart

Orders 2–10

The video uses 5

Size distribution Even · increasing · decreasing

Applied to the chart immediately

03
ACTIVE API KEY

Change which exchange account the UI uses

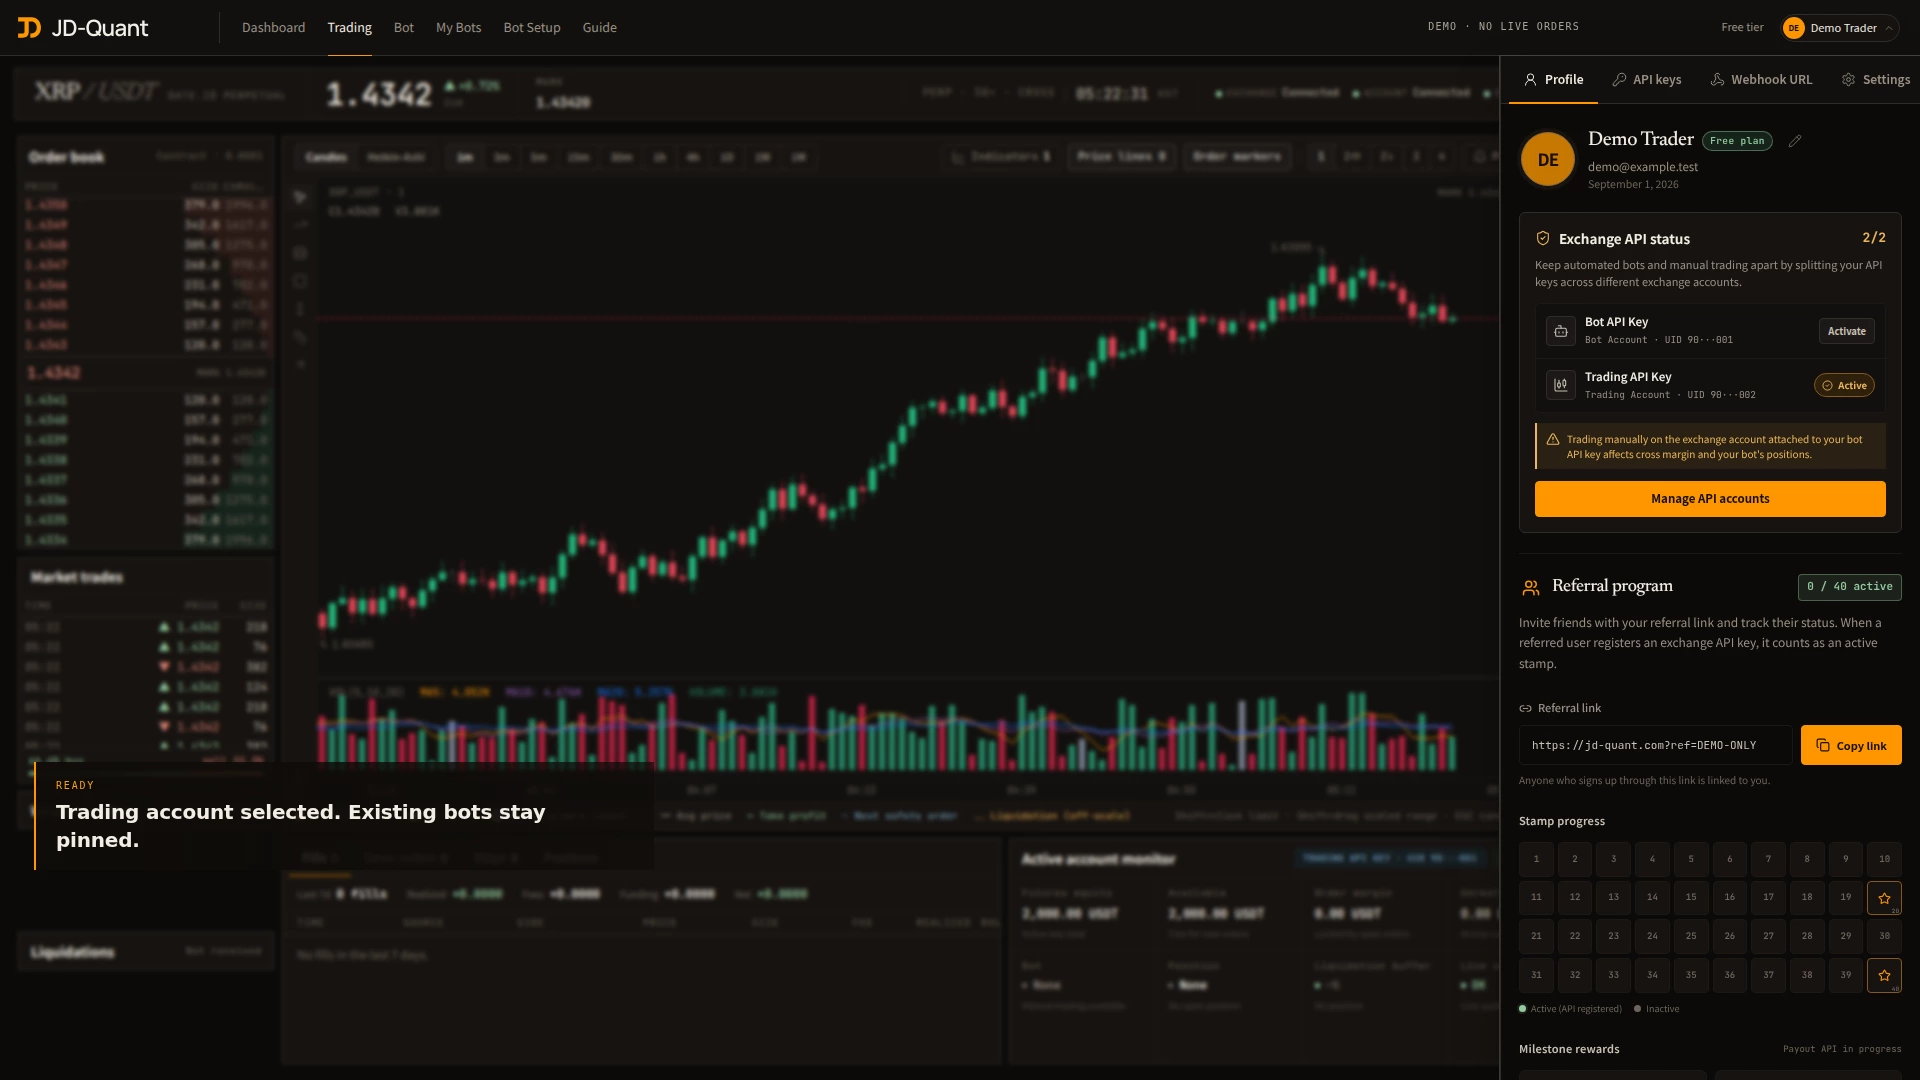
Press the active button in your profile and compare the current and new UID. Only the displayed balance and the Wallet default change — running bots keep their original key.

PROFILEACTIVATE
Change which exchange account the UI uses completion screen
Change which exchange account the UI uses. Press the active button in your profile and compare the current and new UID. Only the displayed balance and the Wallet default change — running bots keep their original key.
UI default account One active key

Applies to dashboards, Trading and Wallet

Bot execution account Keeps its original key

Running bots continue unchanged

Confirm before switching UID → UID

Compare the current and new account

What the active key applies to

The UI default account and bot execution account are managed separately.

UI default account 1 of 2 active
Chosen in your profileActive API key
Dashboard reads Manual orders in Trading Wallet default account
Pinned when the bot is createdA running bot's key never changes
Switching the active key

Check the current and target UID before switching. In-flight requests keep the key they started with.

Wallet transfers

The active key is the default, but you can choose between the bot key and the trading key before the transfer runs.

Auto-payment

Auto-payment does not follow the active key — it is pinned to the API key you chose when setting it up.

After switching, confirm the active badge and UID in your profile match the account shown in Trading and Wallet.
05
Troubleshooting

Start with whatever the error message names

Checking connection status, futures balance, active UID and required fields — in that order — resolves most problems quickly.

Connection check

The key is saved but cannot trade

Cause
Permission, IP, futures account or Wallet readiness has not been confirmed.
What to do
Fix the cause shown in the notice, then press Re-check connection.
Futures balance

Insufficient futures balance

Cause
USDT sitting in Spot is not usable by the bot until it is moved.
What to do
Check the account and amount on the transfer screen, then move Spot → Futures.
Ordering locked

The manual order button is locked

Cause
Either the active API key's connection check is unfinished, or a required field is empty.
What to do
Check the active UID, connection status, size and side in that order.
Bot exists

Cannot start a new bot

Cause
Creating a new bot is blocked while another is running or waiting.
What to do
Check the existing bot and any open position first.
Do not repeat connection checks or orders without fixing the cause. If the same failure repeats, check your API management status and exchange account first.
Final checklist

Confirm just these before you start

When all five below are true, go from API management to Bot Setup.

  • I have confirmed each registered key's exchange account and purpose
  • Exactly one of my registered keys is active
  • I have checked the futures balance on the UID I will use
  • I have checked each bot's allocated amount and stop distance (or the liquidation price in SUMMARY for a single bot)
  • I will re-confirm which API key is used before any Wallet transfer
JD-Quant user guide · 5 chapters Your funds stay on the exchange, and orders and transfers run only after you confirm them.